 Save to Pinterest
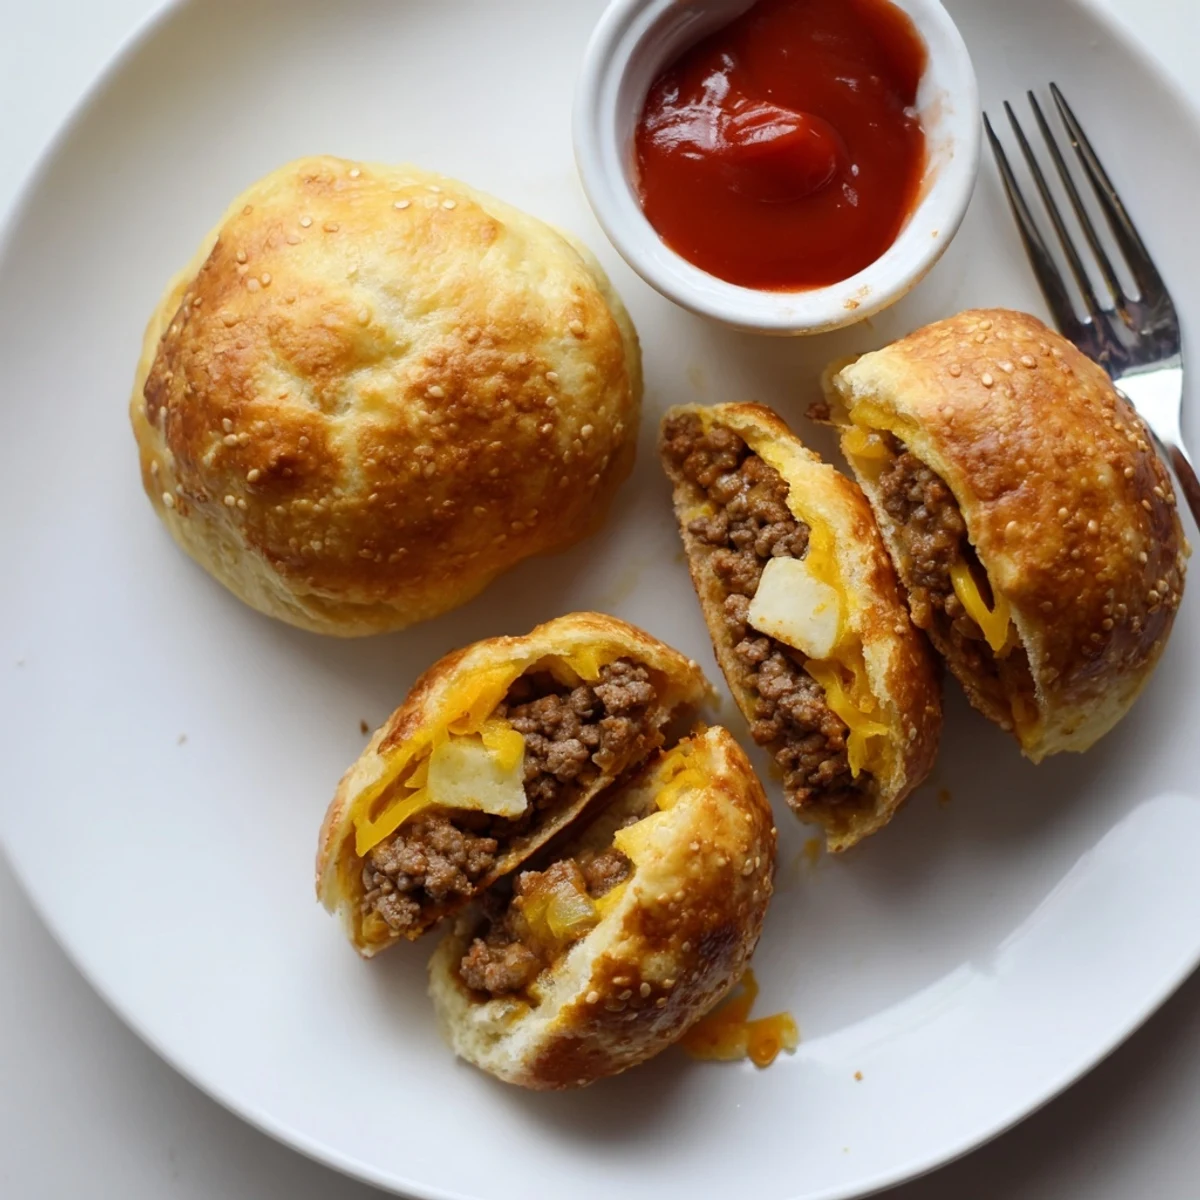
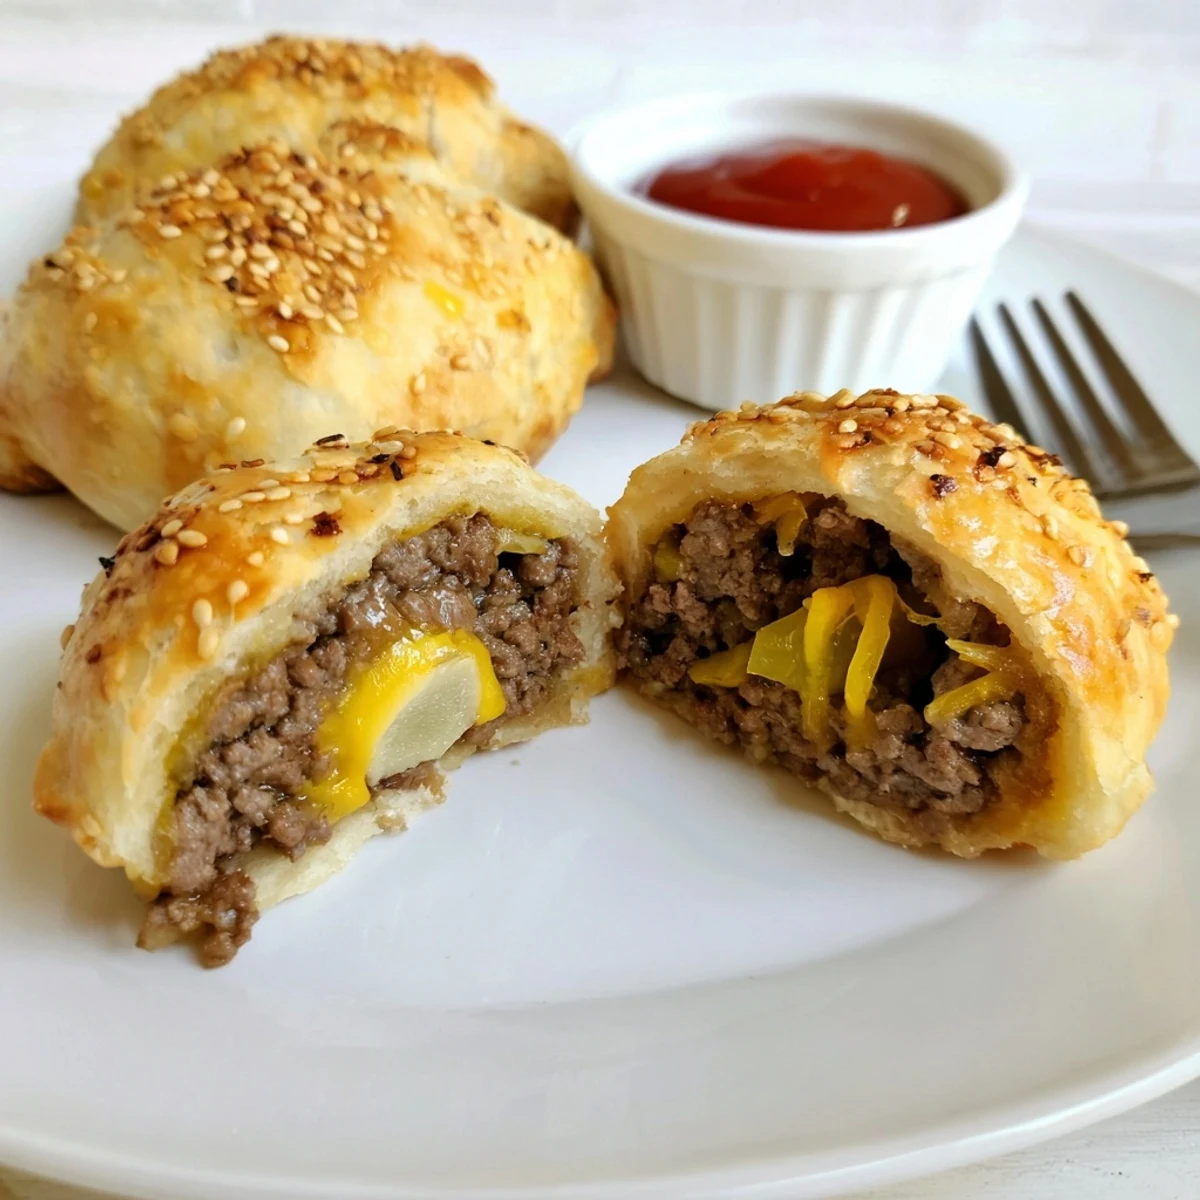
 Preheat oven to 200°C (400°F). Sauté diced onion, brown 450 g ground beef with garlic powder, salt and pepper, then stir in ketchup, mustard, Worcestershire and optional chopped pickle. Spoon cooled filling and shredded cheddar into flattened biscuit rounds, top with a mozzarella cube and seal. Brush with beaten egg, sprinkle sesame seeds and bake 15–18 minutes until golden. Makes 8; total time about 50 minutes. Serve warm with preferred burger sauces.
Biting into these Cheesy Cheeseburger Bombs for the first time, I was instantly surprised by the molten cheese oozing out—an indulgent, playful twist on the regular cheeseburger. What began as a spontaneous snack experiment on a rainy afternoon quickly became a kitchen ritual I can't resist repeating. There's something uniquely satisfying about wrapping each beefy parcel in golden dough, layering flavors where every bite feels like a mini celebration. The sizzle from the beef and aroma of baking cheese fill the house long before they hit the table.
One late summer night, I made these for a group of unexpectedly hungry friends after a spontaneous movie marathon. We ended up huddled around the oven, peeking in to watch the bombs turn golden, then laughing over whose cheese would burst first. It’s now the dish I make when I want to feed a crowd without much fuss or formality—just a bit of fun and a lot of flavor.
Ingredients
- Ground beef: Use 80/20 beef for juicy flavor; don’t skip draining the fat so your bombs don’t get soggy.
- Shredded cheddar cheese: This cheese melts into the beef, binding every bite—use a sharp cheddar for extra tang.
- Mozzarella cubes: Tucking a cube in the center creates that magical cheese-pull moment everyone loves.
- Onion: Sautéing the onion before mixing ensures mild, sweet flavor without harsh sharpness.
- Pickle (optional): A little pickle gives just enough acidity and crunch for burger authenticity—add more if you love extra zing.
- Refrigerated biscuit dough: These make it quick and easy, and their buttery layers crisp up beautifully as they bake.
- Ketchup & mustard: Don’t skip this duo—it’s classic burger flavor, no shortcuts.
- Worcestershire sauce: Adds deep umami; just a teaspoon transforms the beef.
- Garlic powder, salt, black pepper: Use garlic powder to coat evenly without burning, and be generous with fresh pepper.
- Egg: The egg wash makes the bombs gorgeously glossy with a just-snapped bite.
- Sesame seeds: That little extra touch for classic burger flavor and a crunchy topping.
Instructions
- Get Ready:
- Preheat your oven to 200°C (400°F) and line a baking sheet with parchment paper—the anticipation starts here.
- Sauté the Aromatics:
- In a skillet over medium heat, cook the diced onions until soft and fragrant, letting their sweetness signal they're ready for beef.
- Brown the Beef:
- Add the ground beef, garlic powder, salt, and pepper to the onions; break up the meat and stir until it browns, then carefully drain any excess fat so nothing gets greasy.
- Mix in the Flavors:
- With the heat off, stir in ketchup, mustard, Worcestershire, and pickles; love the steam rising as sweet, tangy, and savory notes merge.
- Shape the Bombs:
- Flatten each biscuit with your hands; scoop a heaping spoonful of beef mixture, cheddar, and top with a mozzarella cube into the center.
- Seal and Place:
- Fold the dough up and over the fillings, pinching tight so no cheese escapes; roll gently and set seam-side down on your tray.
- Finish with Flair:
- Brush each bomb with egg wash, then sprinkle sesame seeds on top—they stick better than you’d think and look bakery-perfect.
- Bake to Golden:
- Bake 15 to 18 minutes, watching the tops for a golden color and listening for that soft, hollow sound when gently tapped.
- Cool and Serve:
- Let them rest a few minutes (if you can wait) so the cheese doesn’t burn your tongue, then dive in with your favorite sauces.
 Save to Pinterest
 There was a moment when I served these after a long week at work; the first cheesy pull got a round of cheers and instantly lightened the mood. Sometimes the best comfort comes wrapped in a little golden package, shared at the kitchen counter.
What To Serve With Cheeseburger Bombs
I’ve found these bombs go best with simple things—maybe a crisp green salad or just a heap of crunchy fries. Dipping sauces are a must: tangy ketchup, garlicky aioli, or my own mix of mayo and sriracha for a bit of kick.
Ingredient Swaps and Easy Add-Ins
If you want more heat, swap in pepper jack or toss in chopped jalapeños with the beef. Bacon bits hidden inside make each bite irresistible, and gluten-free dough means nobody misses out. Don’t hesitate to experiment—the recipe is forgiving, and little tweaks always lead to new favorites.
Troubleshooting and Kitchen Tips
Sometimes, the biscuit dough can stick to your hands, so a light dusting of flour makes assembly much easier. If any bombs burst open while baking, just patch with a bit of leftover dough before finishing—nobody’s judging here. And if you wind up with extra beef, save it for nachos tomorrow, a win-win for weeknight meals.
- Wet your fingers a bit to help seal the dough edges.
- Check the bottom for doneness if your oven runs hot—it should be sturdy, not doughy.
- Let kids help with assembly; their wobbly shaped bombs always turn out the most fun.
 Save to Pinterest
 Cheeseburger Bombs make even an ordinary night feel playful and a little bit special. Here’s to gooey cheese, happy hands, and recipes that bring unexpected smiles.
Common Questions
- → How do I prevent the filling from leaking during baking?
-
Drain excess fat after browning the beef and let the mixture cool slightly before filling the dough. Press edges firmly and pinch well to seal; chilling filled rounds briefly in the fridge can help the dough hold its shape during baking.
- → What cheese swaps work well?
-
Sharp cheddar and mozzarella work for melty texture and flavor. Swap cheddar for pepper jack for heat, use Monterey Jack for milder taste, or try a smoked cheddar for extra depth. Grate cheeses finely so they melt evenly inside the dough.
- → Can I make these ahead or freeze them?
-
Yes. Assemble bombs and freeze them seam-side up on a tray until firm, then transfer to a sealed bag. Bake from frozen, adding 5–8 minutes to the baking time, or thaw in the fridge before baking for the usual timing.
- → What's the best way to reheat leftovers?
-
Reheat in a 175°C (350°F) oven for 8–12 minutes or an air fryer at 160–170°C for 4–6 minutes to restore crispness. Microwave will heat quickly but may soften the dough and reduce the crisp exterior.
- → How can I make them gluten-free?
-
Use a gluten-free biscuit or dough alternative and verify that all condiments (like Worcestershire sauce) and processed ingredients are labeled gluten-free. Baking times may vary slightly depending on the dough used.
- → Any tips for extra-crispy exterior?
-
Brush the dough with a generous egg wash and use a hot baking sheet straight from the oven to create immediate oven spring. A light brush of melted butter after baking also enhances browning and flavor.